はじめに
仕事では普通に使っていますが、
個人でgithubりたいときどーすればいいの?って聞かれたので
めんどうなのでコレみてやってっていえる記事をメモります
やりたいことはこんな感じです
補足
windows版はこちら
→githubに適当にリポジトリ作って開発環境としてみるメモ②-windowsにgit cloneってみる
ながれ
- githubアカウント作成(やってある前提)
- github上で適当なリポジトリ作る
- linuxにgitコマンドインストールする
- sshの鍵の設定をする(linux、githubの両方で操作)
- リポジトリcloneする
- お試しでファイルを編集してadd,commit,pushしてみる
1. githubアカウント作成(やってある前提)
こちらはやってある前提なのではぶきます
とはいえ、これみてって言えるようにはしたいので参考リンクを貼って手抜きします
→
『「Github」のアカウントは登録するけど「Github」にはちっとも触らない』ちょっとおバカなGithub「超『超』入門」
2. github上で適当なリポジトリ作る
メインはここからですね
まずはこのあたりの「New repository」とかから新規にリポジトリを作ります

「Repository name」を入れて「Create repository」を押します。
他の項目は任意に入れてみてください

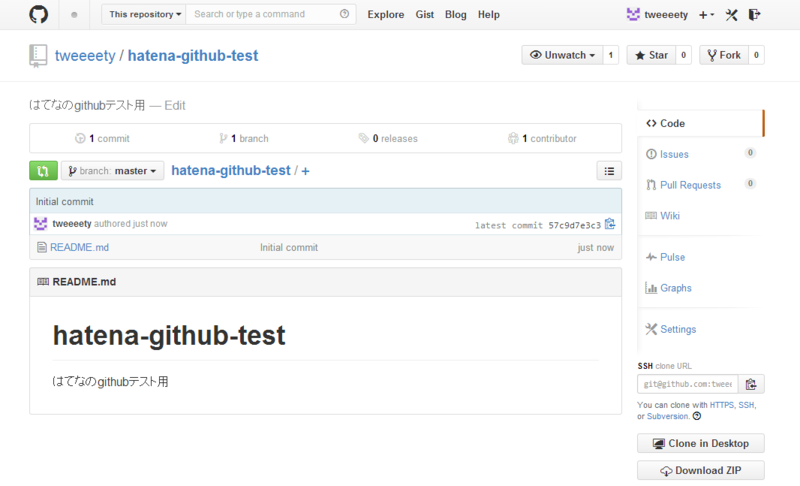
- これだけで完了です!完了画面が表示されました
3. linuxにgitコマンドインストールする
linux上で行うのでそもそもgitコマンドがはいってないと話になりません。
ってことでインストール。といってもこれだけ
# sudo yum install git
※既に入っていれば飛ばしてください
※yum intallだとうまくいかないっていう記事も見かけますのでうまくいかなかったら探してみてください
4. sshの鍵の設定をする(linux、githubの両方で操作)
いよいよclone!と思いきや、
当然ですがsshの設定やら鍵の設定をしてないとcloneもなにもできません。
sshの基本設定って意味ではこちらをご参考に
→さくらvpsの設定自分メモ - ssh設定① - for mac
今回はsshの基本設定がされてるところからの話し。
linux上での操作
鍵の生成
※ github用に鍵を生成
# ssh-keygen -C "for_github"
Enter file in which to save the key (/home/hoge/.ssh/id_rsa):
Generating public/private rsa key pair.
Enter file in which to save the key (/home/hoge/.ssh/id_rsa): id_rsa_github←他の鍵とまざらないように適当に
Enter passphrase (empty for no passphrase):
Enter same passphrase again:
Your identification has been saved in id_rsa_github.
Your public key has been saved in id_rsa_github.pub.
The key fingerprint is:
・・・

# ls -l *github*
-rw------- 1 tweeeety tweeeety 1743  8月  7 22:32 2014 id_rsa_github
-rw-r--r-- 1 tweeeety tweeeety  392  8月  7 22:32 2014 id_rsa_github.pub

※ 確認
# cat id_rsa_github.pub
---ここに表示される文字列を後で使う---
鍵の設定
※ sshのconfigに追加する
# vi ~/.ssh/config
---- vi追記 ----
Host github.com
    User git
    Port 22
    HostName github.com
    IdentityFile ~/.ssh/id_rsa_github
----------------

※テストでつないでみる
# ssh -T github.com
Enter passphrase for key '/home/hoge/.ssh/id_rsa_github':
Hi tweeeety! You've successfully authenticated, but GitHub does not provide shell access.
最後にHi account!みたいな感じで表示されれば成功です
ここまでやったら次はgithub上での操作です
github上での操作
github上では先ほど生成した鍵を登録する作業です
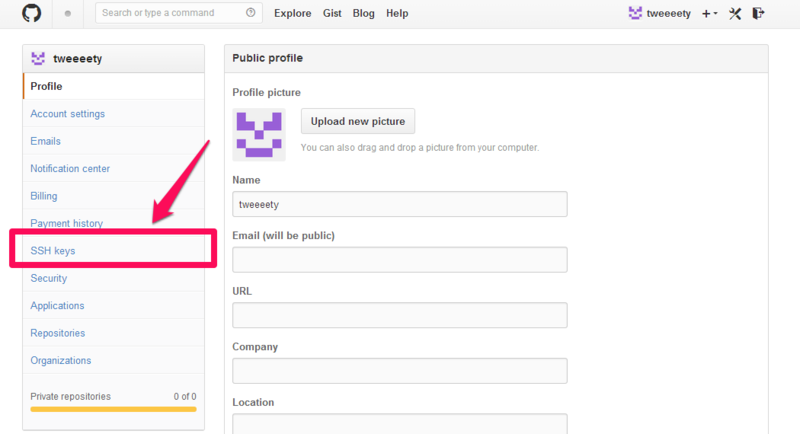
- Account setting(工具っぽいアイコン)をクリックする

- 左メニューのSSH Keysをクリック
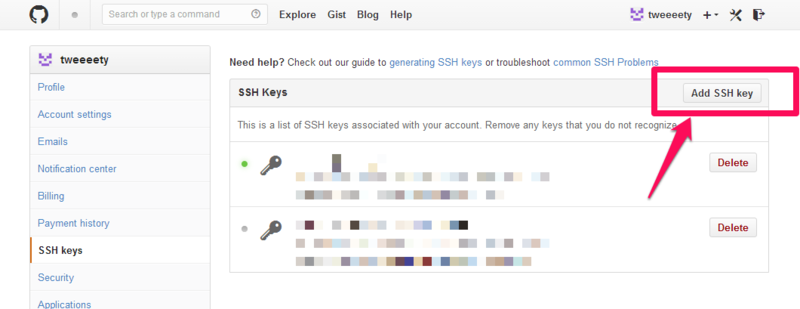
- Add SSH keyをクリック
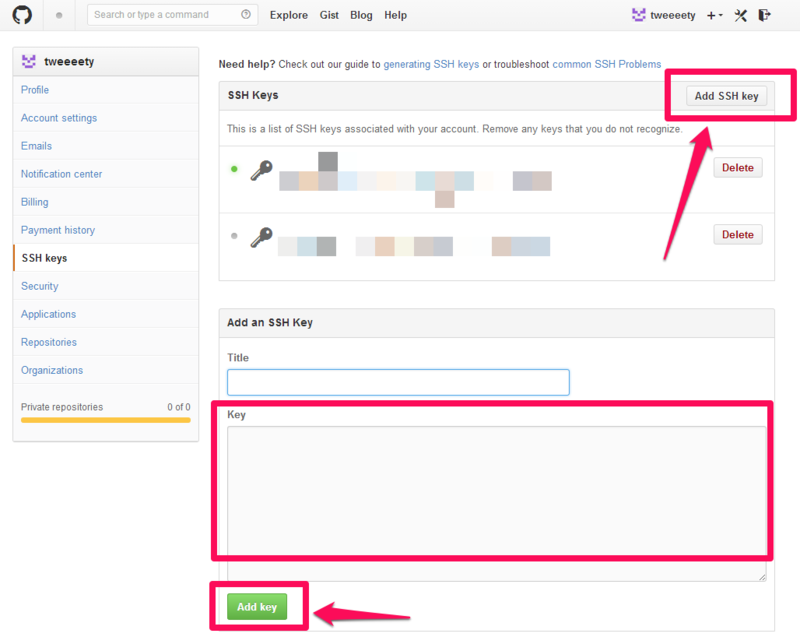
- からの先ほどの鍵文字列をKey欄にコピペ
※上記の---ここに表示される文字列を後で使う---の文字列
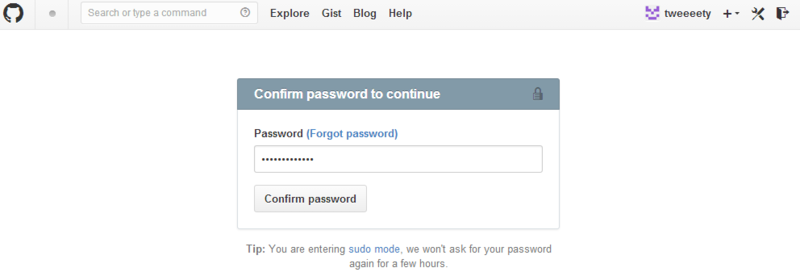
- パスワードを入れてConfirm passwordクリック
- 完了するとこんな感じで鍵が追加されます
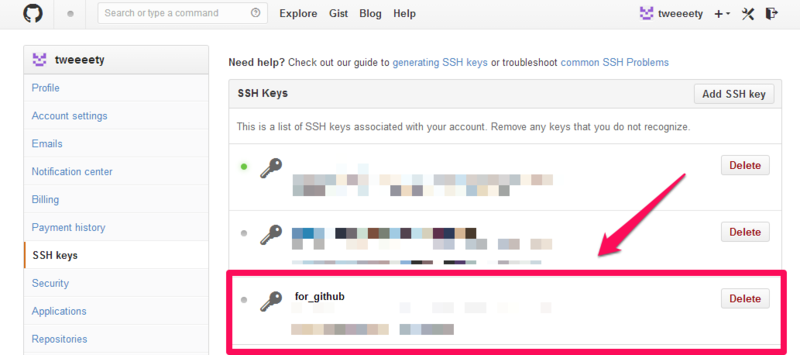
ってことでこれは簡単ですね。
5. リポジトリcloneする
github上での操作
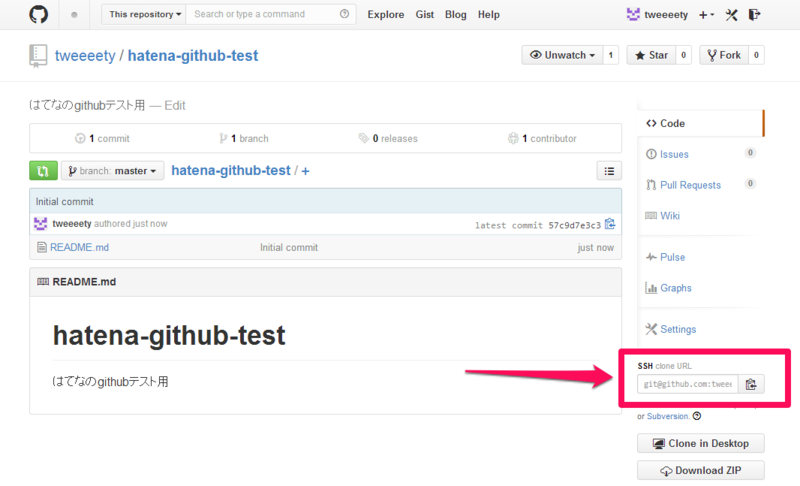
ここでの操作は簡単で、SSHのclone URLをGETするだけです。慣れたら必要ない操作ですね
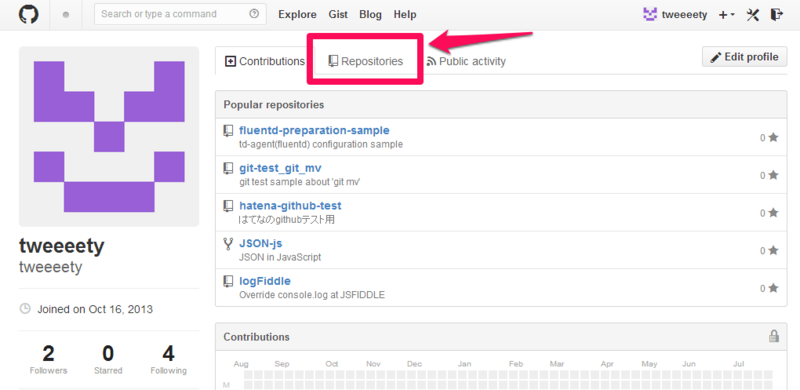
- まずはRepositoriesタブを選択
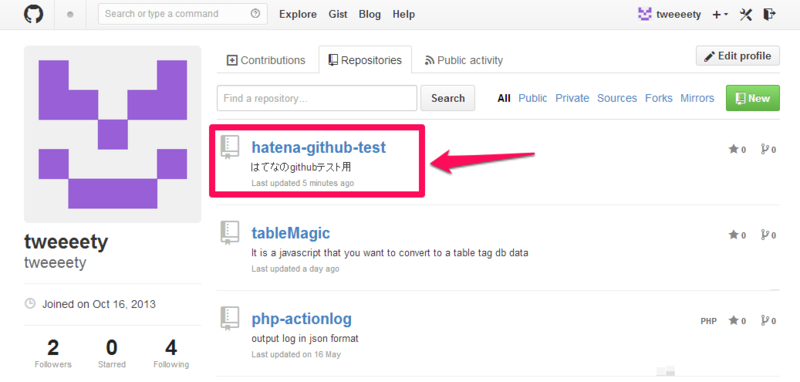
- SSH clone URLをコピーします
linux上での操作
ってことでようやくgit cloneします
リポジトリを作る場所は好きなところに読み替えてください
# pwd
/home/hoge

※ 適当なところにgithubのリポジトリをcloneするディレクトリを作る
# mkdir -p ./github/hatena

# cd github/hatena

※ git clone の後に上記でコピったURLを貼り付け
# git clone git@github.com:tweeeety/hatena-github-test.git
Initialized empty Git repository in /home/tweeeety/github/hatena/hatena-github-test/.git/
Enter passphrase for key '/home/tweeeety/.ssh/id_rsa_github':
remote: Counting objects: 3, done.
remote: Compressing objects: 100% (2/2), done.
remote: Total 3 (delta 0), reused 0 (delta 0)
Receiving objects: 100% (3/3), done.

※ 確認
# ls -l
drwxr-xr-x 3 tweeeety tweeeety 4096  8月  8 21:33 2014 hatena-github-test
ってことで無事cloneできました!
commitやらpushやらはgitそのものの使い方として他の情報をご参考ください!
6. お試しでファイルを編集してadd,commit,pushしてみる
# pwd
/github/hatena/hatena-github-test

# vi README.md
---- vi追記 ----
linuxで追記してみる
----------------

# git add README.md

# git commit -m 'test commit'

# git push
これだけですがgithub上でリポジトリをみるとREADME.mdに追記した文章が表示されてるはず!
まとめ
これで環境はできたので後はお好きにする感じです!enjoy!